


Chapter 9 Next Steps
9.1 Introduction
If you have read all the preceding chapters of this manual, then you should have a good understanding of how to use Canthology. However, you may be wondering, “So far I have learned how to do 95% of what I want to in the anthology I am creating, but how do I learn to do the remaining 5%?” The purpose of this chapter is to answer that question.
9.2 LaTeX Documentation
Recall that Canthology is a simplification wrapper for LaTeX. Because of this, many questions of the form, “How can I do such-and-such with Canthology?” are really questions about how to do such-and-such with LaTeX. To find the answers to such questions, you will probably need to read more about LaTeX.
Many LaTeX books have been published. You can find a list of such books by visiting an on-line bookshop (such as Amazon.co.uk), searching for “latex typesetting”, and then reading customer reviews to narrow down your search.
One book I recommend is LaTeX: a Document Preparation System [5], which provides a good introduction to LaTeX. Alternatively, some good introductory guides to LaTeX are available as free downloads [10] [4].
If an introductory book does not answer your questions about how to do such-and-such, then perhaps the functionality you are seeking is provided by one of the numerous add-on packages available for LaTeX. You can search for these on the Comprehensive TeX Archive Network, which is usually referred to by its acronym: CTAN (www.ctan.org).
The LaTeX Companion [8] discusses over 200 packages that are available for LaTeX. You may find it more convenient to borrow or buy a copy of that book and scan through its contents to find a package that serves your needs rather than search on CTAN.
The Memoir Class for Configurable Typesetting User Guide [14] documents the memoir class, which is a (mostly) backwards-compatible replacement for the book class. The memoir class contains the functionality of several dozen popular packages built into it. So, if you use the memoir class, you are less likely to have to search for additional packages to satisfy your needs.
9.3 LaTeX Errors
Sooner or later, you will encounter an error in a ".tex" file, and this will cause LaTeX to report an error message. It is outside the scope of this manual to discuss the LaTeX error-reporting mechanism. Instead, some introductory books on LaTeX discuss this topic in detail [5] [4].
9.4 Defining New Commands
LaTeX provides numerous built-in commands. It also provides facilities for you to define additional commands. Most books and tutorials on LaTeX discuss this topic in detail, so I will provide only a brief overview here.
Let’s assume you are writing a phrase book for French in which you use a bold font for English words and phrases, and a bold italic font for their French counterparts. Thus, to obtain the following output:
The French for the table is la table.
you might write:
The French for \textbf{the table} is
\textbf{\textit{la table}}.
You may consider those LaTeX font-changing commands to be verbose, especially if you will be using them many times in your book. For this reason, you might want to define two commands, \en (for typesetting English text) and \fr (for typesetting French text), as follows:
\newcommand{\en}[1]{\textbf{#1}}
\newcommand{\fr}[1]{\textbf{\textit{#1}}}
You use the \newcommand command to define a new command. The first argument to \newcommand is the name of the new command that is to be defined. If the new command is to take arguments, then the number of arguments is specified in square brackets; thus, [1] indicates that the new command will take one argument. The final argument to \newcommand is the body of the new command. Within this body, #1 is a placeholder for the first argument, #2 is a placeholder for the second argument, and so on. Having defined the above commands, you can use them as follows:
The French for \en{the table} is \fr{la table}.
Command definitions are usually placed in the preamble of a document, as you can see in Figure 9.1.
\documentclass[12pt,twoside]{book}
\usepackage{color}
\usepackage[english]{babel}
\newcommand{\en}[1]{\textbf{#1}}
\newcommand{\fr}[1]{\textbf{\textit{#1}}}

\begin{document}
    \frontmatter
    ... % omitted for brevity
    \mainmatter
    ... % omitted for brevity
    \backmatter
    ... % omitted for brevity
\end{document}
When using Canthology, you place your command definitions in the preamble of your document by adding them to the root_file.preamble variable.
9.5 Implementing a Package
If you need to define a large number of commands, then you may find it inconvenient to define them all in the preamble of your document. An alternative is to define them in as a package, which is simply a file (with a ".sty" extension) that contains the definitions of commands. Actually, the contents of a ".sty" file are supposed to follow a particular structure to enable LaTeX to manage them. Full details of this structure are discussed in LATEX 2є for class and package writers [11], but you can see a simple example of a package in Figure 9.2.
\NeedsTeXFormat{LaTeX2e}
\ProvidesPackage{example}
\RequirePackage{color}

\newcommand{\en}[1]{\textbf{#1}}
\newcommand{\fr}[1]{\textbf{\textit{#1}}}
... % definition of other commands omitted for brevity
The \NeedsTeXFormat command specifies that the package is compatible with the LATEX 2є version of LaTeX. The \ProvidesPackage command specifies the name of the package. If the commands defined by the package rely upon other packages, then you should use \RequirePackage commands to state those dependencies. After that, you can use \newcommand to define commands.
When you have finished implementing a package, you can use it in a document by adding a \usepackage command in the preamble of the document. For example:
\usepackage{example}
9.6 Background Graphics
The eso-pic package [9] defines commands that enable you to place items on the background of a page. If you combine use of this package with the color or graphicx packages [3], then you can fill the background of a page—typically the title page—with a colour or a graphics file, such as a digital photograph. Canthology provides a simplification wrapper around the eso-pic package that makes it trivial to achieve such effects. The commands provided by Canthology are as follows:
\thisPageBackgroundCommand{\command}
\thisPageBackgroundColor{name}
\thisPageBackgroundColor[mode]{specification}
\thisPageBackgroundImage[options]{fileName}
You can see an example of the \thisPageBackgroundCommand command in Figure 9.3.
 1  @include getenv("CANTHOLOGY_HOME") + "/etc/defaults.cfg";
 2  anthology1 {
 3      @copyFrom "book:a4";
 4      root_file {
 5          base_name = "my-anthology" + macro.paperSizeSuffix;
 6          preamble = preamble + [<%
 7              \newcommand{\rectangleBackground}{%
 8                  \AtPageLowerLeft{%
 9                      \color[rgb]{0.8,0.8,1.0}%
10                      \rule{.33\paperwidth}{\paperheight}%
11                  }%
12              }
13          %>];
14          front_matter = [
15              "\thisPageBackgroundCommand{\rectangleBackground}",
16              "\input{titlepage-template-1.tex}",
17              macro.tableofcontents,
18          ];
19          main_matter = [...];                # omitted for brevity
20          back_matter = [...];                # omitted for brevity
21      }
22      substitutions.search_replace_pairs = [
23          ...                                 # omitted for brevity
24      ] + substitutions.search_replace_pairs;
25  }
Lines 6–13 append the preamble variable with the definition of a command called \rectangleBackground. The body of this command (lines 8–11) uses the \AtPageLowerLeft command (defined by the eso-pic package [9]) to execute two commands—\color and \rule—at the lower-left corner of the current page. The \color command (defined by the color package [3]) sets the foreground colour to be a pale shade of blue. The \rule command (documented in most LaTeX books and tutorials) draws a filled-in rectangle that extends one-third the width and the full height of the page.
Having defined the \rectangleBackground command, the next step is to execute it to set the background for the title page. You do this by passing the command’s name as an argument to \thisPageBackgroundCommand (line 15). Figure 9.4 shows the resulting title page.
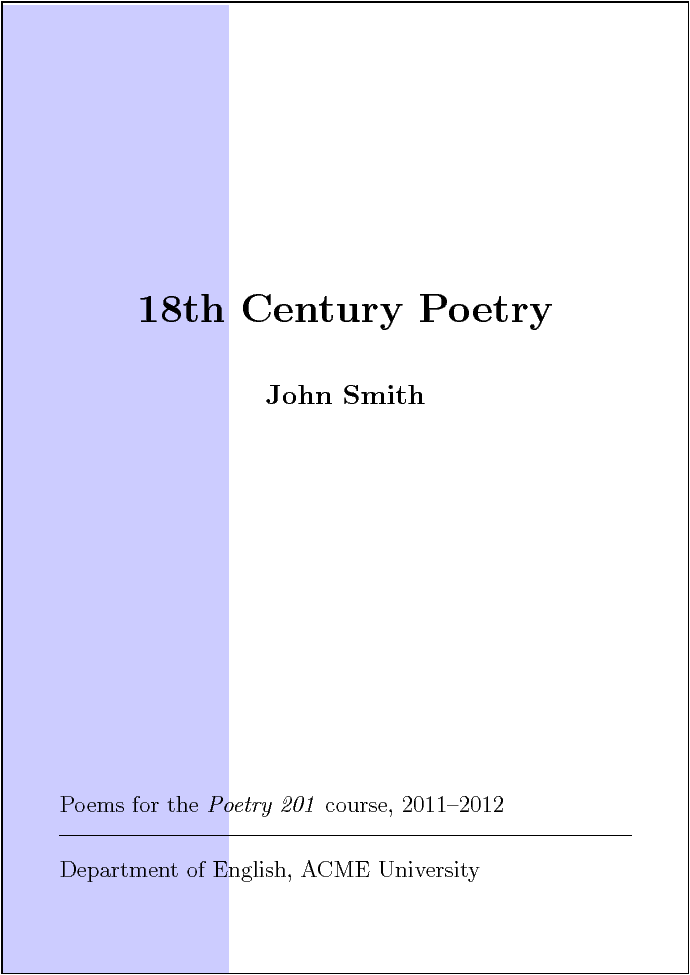
The \thisPageBackgroundColor command fills the background of the entire page with the specified colour. For example, line 7 of Figure 9.5 illustrates how you can set a background colour for the title page. The result of doing so are shown in Figure 9.6.
 1  @include getenv("CANTHOLOGY_HOME") + "/etc/defaults.cfg";
 2  anthology1 {
 3      @copyFrom "book:a4";
 4      root_file {
 5          base_name = "my-anthology" + macro.paperSizeSuffix;
 6          front_matter = [
 7              "\thisPageBackgroundColor[rgb]{0.8,0.8,1.0}",
 8              "\input{titlepage-template-1.tex}",
 9              macro.tableofcontents,
10          ];
11          main_matter = [...];                # omitted for brevity
12          back_matter = [...];                # omitted for brevity
13      }
14      substitutions.search_replace_pairs = [
15          ...                                 # omitted for brevity
16      ] + substitutions.search_replace_pairs;
17  }

The argument to \thisPageBackgroundImage is the name of a file containing an image, for example, a digital photograph in JPEG format. The command scales the image to fit the height and width of the paper, and uses the \includegraphics command [3] to place this scaled image in the background. For example:
\thisPageBackgroundImage{front-cover}
If you specify optional arguments, then these will be passed as optional arguments to the \includegraphics command. The following example specifies that some of the image is to be trimmed off:
\thisPageBackgroundImage[trim=10 20 30 40]{front-cover}
The commands discussed so far in this section are for manipulating the background of the current page. Canthology provides corresponding commands for manipulating the background of every page (starting with the current one):
\everyPageBackgroundCommand{\command}
\everyPageBackgroundColor{name}
\everyPageBackgroundColor[mode]{specification}
\everyPageBackgroundImage[options]{fileName}
If you use one of the “every page background” commands, then later on you can clear the page background by using the following command:
\clearPageBackground
9.7 Creating a Document in Multiple Formats
When you write a document, you might want to make it available in multiple formats, for example, formatted for printing on US Letter paper (which is widely used in America), A4 paper (which is widely used in much of the rest of the world), and A5 paper (for on-screen viewing). This goal can be achieved easily with Canthology, as I explain in this section. The discussion focusses on Figure 9.7, which shows the outline of a Canthology configuration file.
 1  @include getenv("CANTHOLOGY_HOME") + "/etc/defaults.cfg";
 2  anthology1 {
 3      @copyFrom "book:a4";
 4      root_file {
 5          base_name = "my-anthology" + macro.paperSizeSuffix;
 6          preamble = preamble + [...];
 7          front_matter = [...];
 8          main_matter  = [...];
 9          back_matter  = [...];
10      }
11      substitutions.search_replace_pairs = [
12          ...
13      ] + substitutions.search_replace_pairs;
14  }
A slightly tedious way to produce the document in multiple formats is to run Canthology several times, each time modifying line 3 of the configuration file to copy from a desired scope: book:a4, book:a5 or book:letter. The use of macro.paperSizeSuffix in line 5 ensures that the generated PDF files will have the paper size embedded in their names.
By making a slight change to the configuration file, as shown in Figure 9.8, you can avoid the need to edit the file every time you want to change the paper size.
 1  @include getenv("CANTHOLOGY_HOME") + "/etc/defaults.cfg";
 2  format ?= "book:a4";
 3  anthology1 {
 4      @copyFrom format;
 5      root_file {
 6          base_name = "my-anthology" + macro.paperSizeSuffix;
 7          preamble = preamble + [...];      # omitted for brevity
 8          front_matter = [...];             # omitted for brevity
 9          main_matter  = [...];             # omitted for brevity
10          back_matter  = [...];             # omitted for brevity
11      }
12      substitutions.search_replace_pairs = [
13          ...                               # omitted for brevity
14      ] + substitutions.search_replace_pairs;
15  }
Line 2 is a conditional assignment statement: the value "book:a4" is assigned to the format variable only if that variable does not already have a value. By default, the format variable will not already have a value, so the assignment will take place. However, Canthology provides a "-set name value" command-line option that can be used to assign value to the name variable before parsing the configuration file. For example, running Canthology as follows will assign the value "book:letter" to format:
canthology -set format book:letter
The @copyFrom statement on line 4 copies from the scope specified by the value of the format variable.
The overall effect of those small changes is that the configuration file can now adapt itself to the desired output format specified by a command-line option. The following commands show how Canthology can be run three times to produce the document in three different output formats:
canthology -set format book:a4
canthology -set format book:a5
canthology -set format book:letter
Such a sequence of commands could be placed in a UNIX shell script, a Windows ".bat" file, a Makefile or an Ant build.xml file. Doing this makes it possible to automate the generation of a document in multiple output formats.
9.8 The Copyright Page
You might want the page immediately following the title page of a book to contain a copyright notice. The file example-copyright-template.tex (located in the etc/latex directory of your Canthology installation) provides a starting-point for such a page. Figure 9.9 shows what the file looks like when typeset.
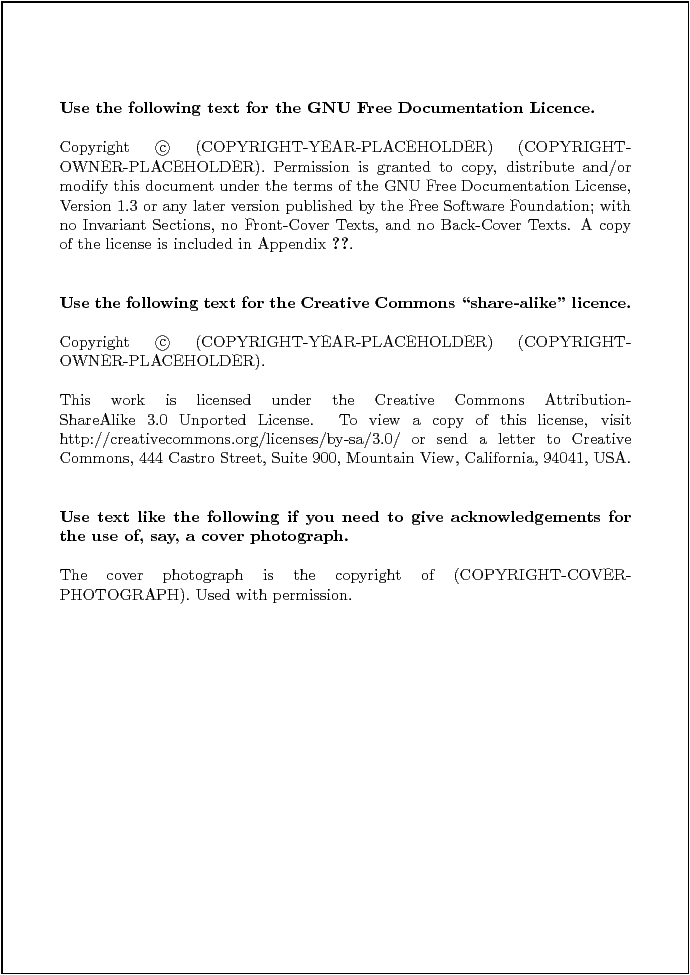
Obviously, the typeset page shown is not suitable for use “as is” in a book. Instead, you should copy example-copyright-template.tex into the directory containing the ".tex" files for your book, rename the copied file to be, say, copyright.tex, and then edit the file to suit your needs.
As you can see in Figure 9.9, the file contains copyright notices for two popular copyright licenses. If you want to use one of those in your book, then you can just delete the text of the unwanted license from your (copied) copyright.tex file.
To add copyright.tex to your book, you should edit your Canthology configuration file and modify the root_file.front_matter variable so it contains the line shown in a bold font below:
root_file {
    base_name = "my-anthology" + macro.paperSizeSuffix;
    front_matter = [
        "\input{titlepage-template-1.tex}",
        "\input{copyright.tex}",
        macro.tableofcontents,
    ];
    main_matter = [...];
    back_matter = [...];
}
9.9 Pages for Praise and a Dedication in a Book
Some books have a page near the start that quotes praising comments from book reviews. Canthology provides the \praise command for typesetting such comments. This command takes two parameters: the name of the person making the comment, and the text of the comment. For example, the following command:
\praise{Ann Other}{A very funny book. It contains many
laugh-out-loud moments, and a hilarious build-up to a
farcical climax.}
is typeset as follows:
“A very funny book. It contains many laugh-out-loud moments, and a hilarious build-up to a farcical climax.”
— Ann Other
Figure 9.10 shows the example-praise-template.tex file that you can find in the etc/latex directory of an installation of Canthology. The commands at the start of the file and the end of the file ensure that the page is typeset nicely in both PDF and HTML formats. You should ignore those commands, and just focus on the examples of the \praise commands.
\cuthere{now}{Praise for \emph{(TITLE-PLACEHOLDER)}}
\cutname{praise.html}
\section*{Praise for \emph{(TITLE-PLACEHOLDER)}}
\thispagestyle{empty}
\praise{One Person}{A brilliant, insightful book.}
\praise{Jane Doe, columnist, {The Popular Newspaper}}{The author’s insights are shockingly pragmatic. Many other authors express their thesis in dry, academic prose which, more often than not, serves to hide flaws in the logic of their arguments. This author bucks the trend by writing in a lucid style that lets his wisdom shine through.}
\praise{Ann Other}{A very funny book. It contains many laugh-out-loud moments and a hilarious build-up to a farcical climax.}
\praise{John Smith, CEO of Standard Example Co.}{The book offers some good ideas for making sure your organisation’s employees are empowered to do their jobs without having to battle bureaucratic red tape on a daily basis.}
\newpage
The typeset output of example-praise-template.tex is shown in Figure 9.11.
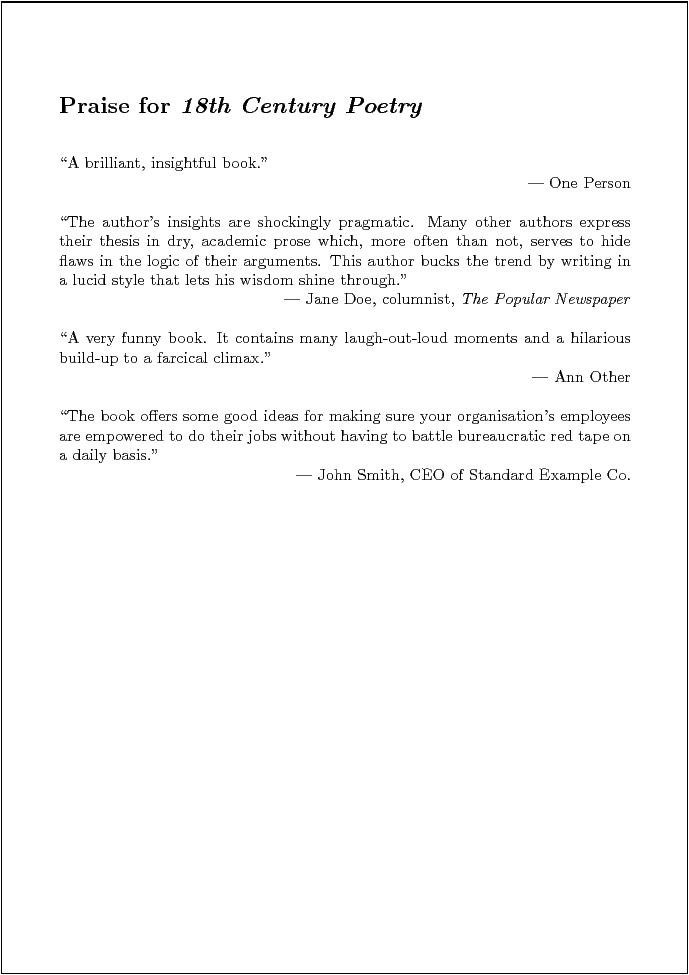
If you decide you want to have such a page near the start of your book, then you should copy the example-praise-template.tex file from the $CANTHOLOGY_HOME/etc/latex directory to the directory where you have the ".tex" files for your book. You might want to rename the copied file to remove the "example-" prefix. Then edit the copied file to insert real reviewers’ comments. Finally, edit your Canthology configuration file to add line 8 as shown in Figure 9.12. Also ensure that the configuration file contains a substitution value for "(TITLE-PLACEHOLDER)" (line 16).
 1  @include getenv("CANTHOLOGY_HOME") + "/etc/defaults.cfg";
 2  anthology1 {
 3      @copyFrom "book:a4";
 4      root_file {
 5          base_name = "my-anthology" + macro.paperSizeSuffix;
 6          front_matter = [
 7              "\input{titlepage-template-1.tex}",
 8              "\input{praise-template.tex}",
 9              "\input{dedication-template.tex}",
10              macro.tableofcontents,
11          ];
12          main_matter = [...];
13          back_matter = [...];
14      }
15      substitutions.search_replace_pairs = [
16         "(TITLE-PLACEHOLDER)",       "18th Century Poetry",
17         "(AUTHOR-PLACEHOLDER)",      "John Smith",
18         "(DEDICATION-PLACEHOLDER)",  "For Sam,\\the love of my life.",
19          ...
20      ] + substitutions.search_replace_pairs;
21  }
Figure 9.12 also shows how to add a dedication page to your book. Line 9 inputs dedication-template.tex, and line 18 specifies the text of the placeholder to be used. The typeset result is shown in Figure 9.13.

9.10 Cross References
When writing documents, I sometimes want to provide a cross-reference to another part of the document. For example, if I want to remind readers how to install Canthology, then I might write “You can find details of this in Section 6.2”. In this section, I explain the basic LaTeX commands for creating such cross references and Canthology’s simplification wrapper around those LaTeX commands.
Cross-referencing commands are unlikely to be useful if you are using Canthology to produce, say, an anthology of short stories—because the text in one short story is unlikely to need to cross reference another short story. However, if you are writing a technical article or a product manual, then you are much more likely to want to provide cross references between different parts of the document.
Most books on LaTeX explain how to do cross-referencing in a document. But for the benefit of readers who have yet to read such a book, I provide a brief overview in Section 9.10.1. Readers who are already familiar with the \label, \ref and \pageref commands can skip to Section 9.10.2.
9.10.1 The \label, \ref and \pageref Commands
Creating cross references in a LaTeX document is a two-step process.
- You use the \label command to define a label (that is, name) for “something” in a document. The “something” might be a part, chapter, section, subsection, floating figure or a table.
- Once a label has been defined, you can then use the \ref or \pageref commands to provide a cross reference to it.
You can see some examples of how to define labels in Figure 9.14.
\chapter{How Canthology Operates}
\label{ch:op}

\section{Introduction}
\label{sect:op:intro}
... % text in section omitted for brevity

\section{Configuration File and Scopes}
\label{sect:op:cfg-file-and-scopes}
... % text in section omitted for brevity
Each time you execute a command such as \part, \chapter, \section, \subsection or \caption (used in floating figures and tables), it increments some counters specific to that command. The \label command associates its parameter with the most recently updated counter values.
The \ref command converts a label into the label’s counter value. The example below uses the labels defined in Figure 9.14 as parameters to the \ref command:
Chapter~\ref{ch:op} starts with
Section~\ref{sect:op:intro} and then continues with
Section~\ref{sect:op:cfg-file-and-scopes}.
LaTeX typesets that as follows:
Chapter 8 starts with Section 8.1 and then continues with Section 8.2.
There are two points worth noting about the above example.
First, ~ is used to insert a non-breakable space
between “Chapter” or “Section” and the following number. This is
because professional typesetters consider it bad style to allow a
line break at such a place.
Second, although you can use whatever names you want for labels, you will find it easier to maintain documents if the names of labels follow a consistent naming scheme. I like to use "ch:" as a prefix for chapter labels, "sect:" as a prefix for section and subsection labels, "fig:" as a prefix for captions in floating figures, and so on. After the prefix, I like the remainder of the label to be an abbreviation of the name of the chapter, section, figure or whatever.
The \pageref command converts a label into a page number. It is typically used as follows:
See Section~\ref{sect:op:cfg-file-and-scopes} on
page~\pageref{sect:op:cfg-file-and-scopes} for more
details.
9.10.2 Convenience Commands for Cross Referencing
It is possible to use \newcommand to define more concise commands for cross-referencing as the example below illustrates:
\newcommand{\xp}[1]{Part~\ref{#1}}
\newcommand{\xa}[1]{Appendix~\ref{#1}}
\newcommand{\xc}[1]{Chapter~\ref{#1}}
\newcommand{\xs}[1]{Section~\ref{#1}}
\newcommand{\xf}[1]{Figure~\ref{#1}}
\newcommand{\xt}[1]{Table~\ref{#1}}
\newcommand{\xpp}[1]{Part~\ref{#1} on page~\pageref{#1}}
\newcommand{\xap}[1]{Appendix~\ref{#1} on page~\pageref{#1}}
\newcommand{\xcp}[1]{Chapter~\ref{#1} on page~\pageref{#1}}
\newcommand{\xsp}[1]{Section~\ref{#1} on page~\pageref{#1}}
\newcommand{\xfp}[1]{Figure~\ref{#1} on page~\pageref{#1}}
\newcommand{\xtp}[1]{Table~\ref{#1} on page~\pageref{#1}}
The naming scheme used in the above commands is as follows.
- The first letter of the command is x, which English speakers sometimes use as an abbreviation for “cross”. In the above commands, it is used as an abbreviation of “cross reference”.
- The next letter indicates what is being cross-referenced. Thus \xc produces a cross reference to a chapter, \xs produces a cross reference to a section, and so on.
- If the command name consists of three letters ending in p, then the comamnd prints “on page …” after the cross reference.
Earlier, I gave some examples of using the \ref and \pageref commands:
Chapter~\ref{ch:op} starts with
Section~\ref{sect:op:intro} and then continues with
Section~\ref{sect:op:cfg-file-and-scopes}.

See Section~\ref{sect:op:cfg-file-and-scopes} on
page~\pageref{sect:op:cfg-file-and-scopes} for more
details.
Using the newly defined \xc, \xs and \xsp commands, those examples can be written more compactly:
\xc{ch:op} starts with \xs{sect:op:intro} and then
continues with \xs{sect:op:cfg-file-and-scopes}.

See \xsp{sect:op:cfg-file-and-scopes} for more details.
There is further room for improvement. The varioref package [7] defines a command called \vref, that I will explain by an example. Consider the following statement:
I discuss that topic in Section~\vref{sect:something}.
LaTeX may typeset that sentence in one several ways, including:1
- I discus that topic in Section 3.9.
- I discus that topic in Section 3.9 on page 42.
- I discus that topic in Section 3.9 on the facing page.
- I discus that topic in Section 3.9 on the next page.
- I discus that topic in Section 3.9 on the following page.
- I discus that topic in Section 3.9 on the previous page.
- I discus that topic in Section 3.9 on the preceding page.
The first wording might be used if the referenced label is on the same page. If the referenced label is two or more pages away, then the second wording is used. If the document is printed in two-sided mode, then the varioref package assumes the document will be bound like a book, which means a reader can see two pages at a time. In this case, if the referenced label is on the other visible page, then the third wording (that is, “on the facing page”) is used. If the referenced label is only one page away but is not on the facing page, then one of the last four variations of wording is used.
If we want to take advantage of this flexibility offered by the varioref package, then we can alter the definitions of the \xpp, \xap, \xcp, \xsp, \xfp and \xtp commands as shown below:
\newcommand{\xp}[1]{Part~\ref{#1}}
\newcommand{\xa}[1]{Appendix~\ref{#1}}
\newcommand{\xc}[1]{Chapter~\ref{#1}}
\newcommand{\xs}[1]{Section~\ref{#1}}
\newcommand{\xf}[1]{Figure~\ref{#1}}
\newcommand{\xt}[1]{Table~\ref{#1}}
\newcommand{\xpp}[1]{Part~\vref{#1}}
\newcommand{\xap}[1]{Appendix~\vref{#1}}
\newcommand{\xcp}[1]{Chapter~\vref{#1}}
\newcommand{\xsp}[1]{Section~\vref{#1}}
\newcommand{\xfp}[1]{Figure~\vref{#1}}
\newcommand{\xtp}[1]{Table~\vref{#1}}
Canthology implements the above commands as shown.
Since the \vref command is so flexible, you may wonder why Canthology provides two variations of each cross-referencing command, for example, the flexible \xsp along with its less flexible \xs counterpart. There are two reasons for this.
First, let’s assume I am writing a paragraph in which I discuss “Figure 2.9 on page 26”. The first time I mention the Figure 2.9, I want to specify its page number as a convenience to readers, so I use the \xfp command for the cross reference. But if I mention the figure a second (and possibly even a third) time in the same paragraph, then it is redundant (and irritating to readers) to keep specifying its page number, so I use the \xf command instead.
Second, there is a boundary case that can sometimes cause \vref to fail, in which case LaTeX reports an error message and stops. To understand this, assume that on page 25 of a document, I want to cross-reference Figure 2.9 that happens to be on the next page. In this case, we might expect:
Figure~\vref{fig:something}
to produce:
Figure 2.9 on the next page
Most of the time, that is what happens. However, a problem occurs if the text “Figure 2.9 on the next page” is being typeset at the very bottom of page 25 and a page break occurs between “Figure 2.9” and “on the next page”. In this case, the text “on the page next” would no longer be valid since that text appears on the same page as the figure. In such a case, the \vref command reports an error and LaTeX stops. On the rare occasion when this happens, it is useful to replace use of the \xfp command with \xf to eliminate the error message.
9.10.3 Simplifying Cross References Produced by \vref
Although the varioref package is very flexible, its assumption that a two-sided document will be bound like a book—and thus two pages will be visible at the same time—is not always correct. For example, a two-sided document may be stapled in the top left-hand corner. Or you might read a PDF version of the document on a computer screen, using a PDF viewer that is configured to show only one page at a time. In such cases, it can be annoying to read, “Figure 2.9 on the facing page” because there isn’t a visible facing page.
Another potential annoyance is that the varioref package likes to add some variation into the text used for cross references. For example, the \vref command sometimes might claim that Figure 2.9 is “on the next page” and other times might claim that it is “on the following page”. Such variations in phrasing might seem like a good idea, because it helps to avoid monotony. However, it is possible for such a variation in wording to occur between different runs of LaTeX, and the difference in length of the text might cause a bad line break or a page break at unpredictable times. For this reason, it can be useful to intruct the varioref package to not use variations in phrasing.
The canthology package defines a command that instructs varioref to avoid: (1) using the phrase “on the facing page”, and (2) alternating between “on the previous/next page” and “on the preceding/following page”. The name of this command is \simplifyVariorefReferences.
- 1
- The varioref package provides the ability to customise the different variations of wording, but I will discuss only the above examples to give a flavour of the package’s ability.